


|
The Emulator shows, on your computer, how your MIDP applications operate on a variety of mobile devices. Consequently, you can test your applications using the same platform you use to develop them, and defer testing on real devices until later in the development process.
It must be emphasized that having an Emulator does not represent a specific device thus it does not completely free you from testing on your target devices.
The J2ME Wireless Toolkit includes emulations of various example devices. They all support the MIDP, MMAPI,WMA, CLDC, J2ME Web Services, and Java Technology for the Wireless Industry specifications. The default emulated device is DefaultColorPhone. You can select one of the other devices from the Device drop-down list on the KToolbar.
This section describes the devices in more detail, and how to input text on these devices. For information about how to add more device definitions to the Emulator, see the J2ME Wireless Toolkit Basic Customization Guide, which comes with the J2ME Wireless Toolkit.
The emulated devices, such as DefaultColorPhone, are generic examples of devices that implement MIDP. The following table shows in more detail how the emulated devices differ.
When your application is running on an emulated device, you can use the Pause and Resume commands on each device to simulate a phone event. The commands enable you to interrupt a running application and resume its execution afterwards.
Choosing MIDlet -> Pause simulates an incoming call alert and stops an application during runtime. Choosing MIDlet -> Resume continues the application at the moment it was paused.
The DefaultColorPhone device is a generic device representing a MIDP-enabled cellular phone with a color screen. The DefaultGrayPhone is identical in all aspects except for its screen, which is grayscale.
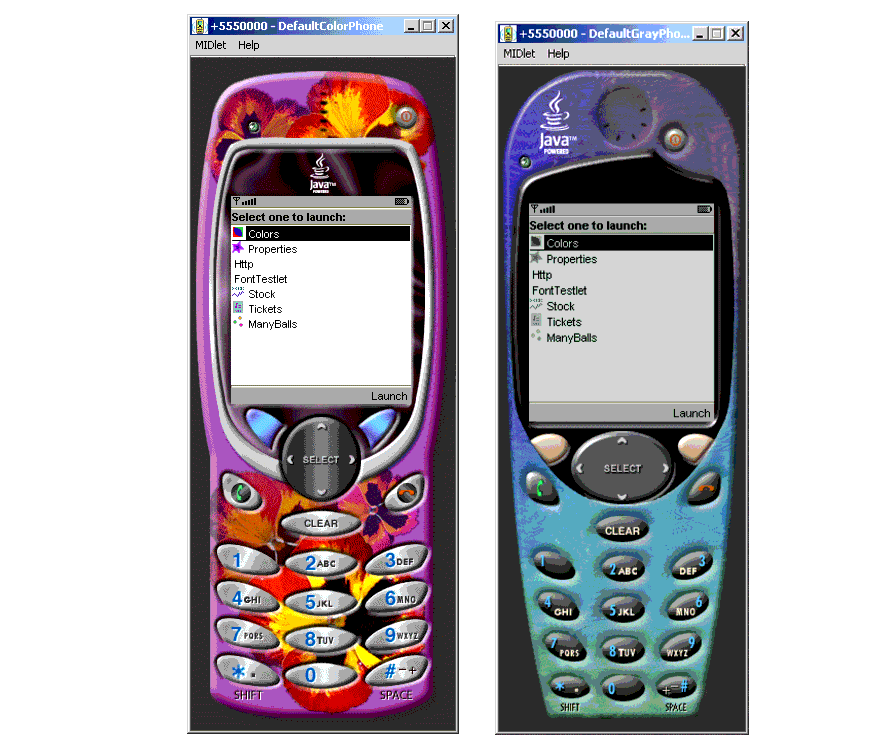
The interface for both devices includes:
Command menus are displayed by clicking the soft button Menu when it is displayed. The other soft button can still be used while the menu is displayed. The keys 7, 9, pound and asterisk are used for the game actions A, B, C and D. SELECT is used for the game action FIRE.
The MediaControlSkin is identical in function to the DefaultColorPhone and DefaultGrayPhone. This particular skin has a keypad that displays audio and video playback controls that can be used when running the mmademo.
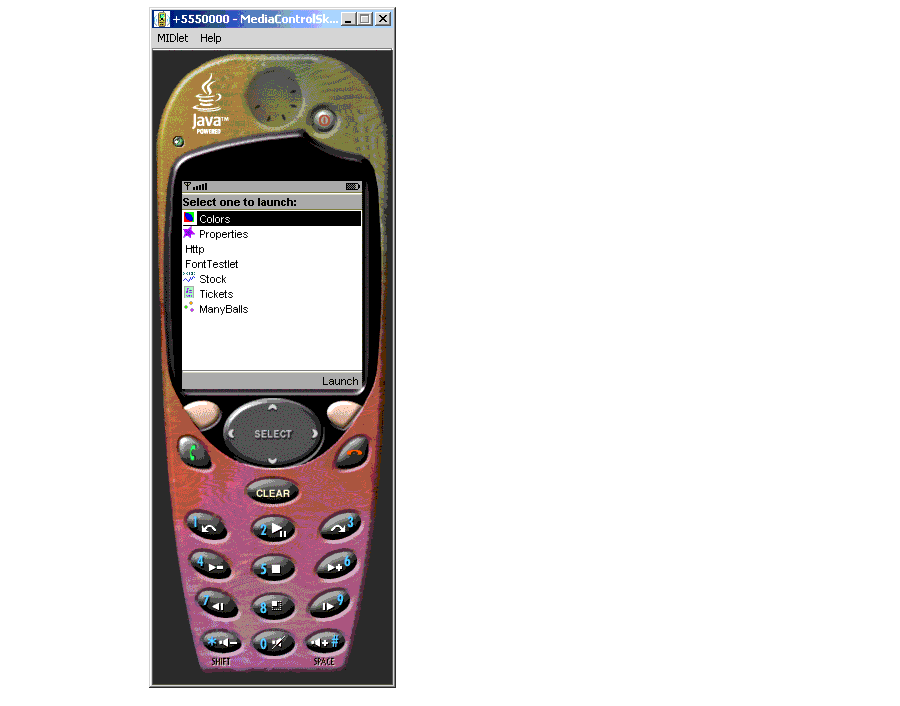
For information on the audio and video controls and the mmademo, see the “MMADemo and MediaControlSkin” document in the {j2mewtk.dir}\docs directory.
The QwertyDevice emulates a generic handheld device that uses a Qwerty style keyboard. The emulation does not represent accurately the look-and-feel of a specific handheld device. The intent of this emulation is to demonstrate the J2ME Wireless Toolkit’s support for devices that use Qwerty style keyboards.
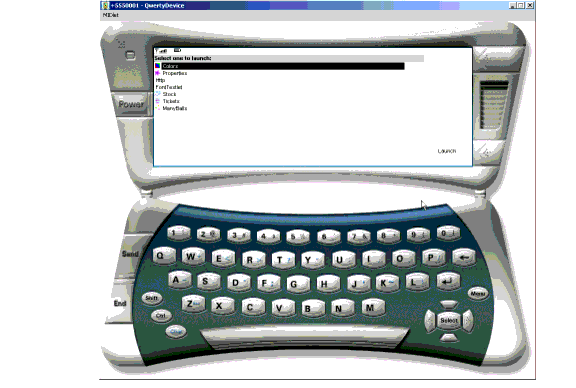
This device has the following keys:
The device also has POWER, SEND, and END buttons. The A, B, C, and D keys are used for the matching game actions. SPACE is used for the game action FIRE.
When a MIDP application needs character input from the user, it displays a text box. For each of the bundled devices, you can enter text into this box using the buttons in the interface of the device or the keyboard of your computer.
You can use the keypad of the DefaultColorPhone, DefaultGrayPhone, and the QwertyDevice devices to input text. The functions of the pound ('#') and asterisk ('*') keys vary depending on the type of input being requested:
See the API documentation for javax.microedition.lcdui.TextField for details on MIDP input constraints.
The Preferences and Utilities tools enable you to set attributes or tools specific to the default emulator devices, DefaultColorPhone, DefaultGrayPhone, MediaControlSkin, and the QwertyDevice.
You can use the Preferences and Utilities tools from within a development environment, such as KToolbar. You can access the Utilities tools from the KToolbar’s File menu. You can access the Preferences tools from the KToolbar’s Edit menu.
Alternatively, you can use the tools from the Microsoft Windows Start menu.To start the Preferences tool from the Microsoft Windows Start menu:
To run the Utilities tool:
If you are using the Wireless Toolkit with an IDE, see the documentation on the IDE you are using for information on how to access the Preferences and Utilities tools.
Use the DefaultEmulator Preferences dialog box to configure the DefaultEmulator devices.
To open the Preferences dialog box:
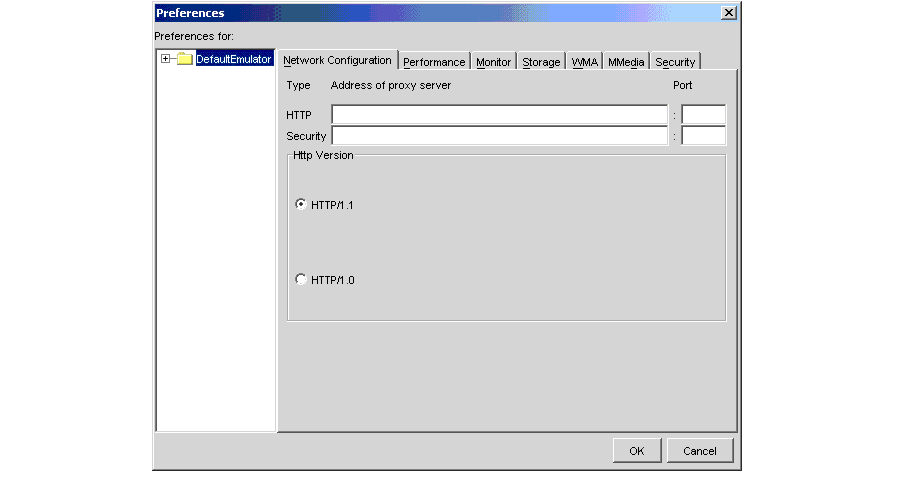
If you want to run Java applications that require Web connections, and if such connections can be made only through a proxy server (when the Web server is on the other side of a firewall, for example), then you need to configure the Emulator with proxy server information.
To specify proxy information for HTTP connections in the Network Configuration tab:
To specify proxy information for HTTPS connections:
If you are unsure about the correct proxy settings, ask your system administrator.
The Wireless Toolkit provides you with two versions of HTTP to work with. Version 1.0 is provided for development purposes only. The MIDP specification requires that HTTP version 1.1 is supported. Selecting version 1.0 in the Network Configuration tab of the Preferences dialog box disables some of the version 1.1 features, such as chunking messages and providing a persistent connection to enable you to work with servers that do not support version 1.1.
You can adjust the drawing and refresh speed for your application, its network speed parameters, and the VM speed emulation from the Performance tab of the Preferences dialog box. See "Managing Device Speed" in Chapter 4, "Performance Tuning and Monitoring Applications” for information on setting these attributes.
You can enable one or more of the performance monitoring features, memory monitoring, network monitoring, and method profiling from the Monitor tab of the Preferences dialog box. For details about these features, see Chapter 4, "Performance Tuning and Monitoring Applications.”
From the Monitor tab, you can also configure the Emulator to trace certain types of events:
To enable (or disable) tracing of any of these events, check (or uncheck) the corresponding boxes in the Monitor tab in the Preferences dialog box.
You can specify the amount of heap memory to make available to MIDP applications in the Storage tab. To set the heap size:
You can specify a storage directory in the Storage tab of the Preferences dialog box prior to running your MIDlet.
To set the storage directory:
The directory is created under the appdb directory. A database (.db) file is created and placed in the specified directory. The default directory location is {j2mewtk.dir}\appdb\<device_name>. The Wireless Toolkit automatically allocates different storage directories for different emulated devices.
The WMA panel of the Preferences dialog box enables you to set WMA messaging related features, such as:
For information about these parameters and how to set them, see "Setting WMA Preferences" in Chapter 7, "Wireless Messaging with the Wireless Toolkit.”
You can choose which multimedia features and formats you want supported for your multimedia application from the Media tab of the Preferences window. You can select one or all of the following formats: WAV audio, MIDI, or Video. You can also select one or all of the following optional features: Audio Mixing, Audio Record, Audio Capture, or MIDI Tones.
A security domain enables the identification of MIDlets by their origin. Only one domain type can be assigned to a MIDlet suite. These settings are relevant when you are running your application locally. These settings not relevant when running using OTA provisioning where the security status is determined by the signing of the MIDlet suite.
To specify a security domain type from the Security tab in the Preferences dialog box:
Once your MIDlet suite has been built and packaged, see "Signing MIDlet Suites" in Chapter 6, "Using Security Features in the Wireless Toolkit” for information on signing a MIDlet suite.
For information on permissions and security domains, see the MIDP 2.0 Specification at http://java.sun.com/products/midp.
You can use the DefaultEmulator Utilities window to run the DefaultEmulator’s utilities.
To open the Utilities window:
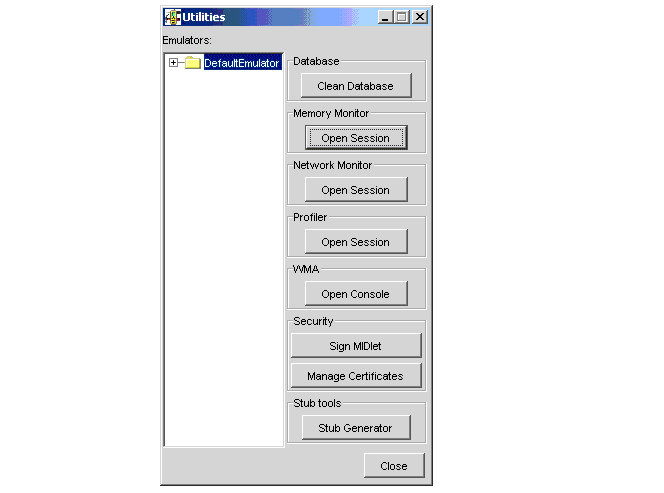
The DefaultEmulator simulates a client device’s local storage by maintaining small database files on your computer. To erase these database files, click Clean Database.
You can view memory usage from a previously saved session to see where a bottleneck in your application’s performance might be occurring by reviewing its memory usage during runtime. The Memory Monitor provides several kinds of memory usage information, such as the amount of memory that live class objects use during program execution. For information on how to use the Memory Monitor, see "Examining Memory Usage" in Chapter 4, "Performance Tuning and Monitoring Applications.”
You can use the DefaultEmulator to simulate the transmission of messages to and from a device and the internet. You can open a saved monitoring session to examine details about previous transmission simulations. For information on how to use the Memory Monitor, see "Monitoring Network Traffic" in Chapter 4, "Performance Tuning and Monitoring Applications.”
The Profiler collects data from the DefaultEmulator during runtime. By seeing how much time a method takes to execute from a saved profiling session, you can see what areas of your application could be slowing down execution time. For information on examining profiling information, see "Profiling Your Application" , in Chapter 4, "Performance Tuning and Monitoring Applications.”
You can test your messaging MIDlet with the WMA console. You can send a message in either text or binary form using either the Short Message Service (SMS) or Cell Broadcast Service (CBS) from the WMA Console window to an emulated device. For information on sending SMS and CBS message, see. For information on monitoring SMS and CBS message connections, see Chapter 7, "Wireless Messaging with the Wireless Toolkit.”
You can use the security features to facilitate the signing process for your MIDlet suite. You can select a certificate of authentication for a public key from the J2SE Keystore or import a certificate obtained from a certificate authority (CA) and copy the certificate to the J2ME keystore. When you sign a MIDlet suite, the signing tool copies the certificate into the specified JAD for you. The JAR file’s digital signature is automatically stored in the JAD file for you as well.
You can maintain the list of certificates in the J2ME Keystore through the J2ME Certificate Manager. The manager enables you to view information about the selected certificate in the J2ME Keystore. You can check the validation period for a specific certificate, import a certificate from the J2SE Keystore, and delete expired certificates from the J2ME Keystore.
For information on how to use the security features, see "Signing MIDlet Suites" in Chapter 6, "Using Security Features in the Wireless Toolkit.”
The implementation of Web Services for J2ME technology clients is based on J2ME Web Services (JSR-172). You can use the KToolbar Stub Generator to generate a stub connector for J2ME Web Services. You will need to provide an XML configuration file that contains a Web Services Descriptor Language (WSDL) file. We recommend that you place the XML file in the {j2mewtk.dir}\apps\<project_name> directory.
For information on how to use the Stub Generator to access J2ME Web Services, see "Using the Stub Connector to Access J2ME Web Services" ” in Chapter 3, "Operating with KToolbar.”


|
User's Guide Java™ 2 Platform, Micro Edition, Wireless Toolkit, Version 2.1 |
Copyright © 2003 Sun Microsystems, Inc. All rights reserved.