
Fall Semester, 2001
Classes Part 1
© 2001, All Rights Reserved, SDSU & Roger Whitney
San Diego State University -- This page last updated 13-Sep-01

|
CS 535 Object-Oriented Programming & Design Fall Semester, 2001 Classes Part 1 |
|
|---|---|---|
|
© 2001, All Rights Reserved, SDSU & Roger Whitney San Diego State University -- This page last updated 13-Sep-01 |
Procedural Paradigm
Programs consists of data and procedures
Procedures manipulate data passed to them
Programs organized by
Object-Oriented Paradigm
Program consists of objects interacting
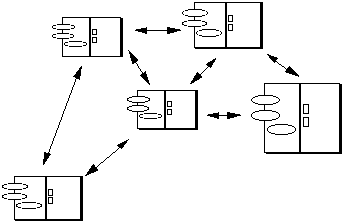
Objects:
Software Development & Modeling
Each stage of software development is modeling
Modeling & Objects
Base system design on structure of problem
Objects are the bases of OO design
Example Problem
A refrigerator has a motor, a temperature sensor, a light and a door. The motor turns on and off primarily as prescribed by the temperature sensor. However, the motor stops when the door is opened. The motor restarts when the door is closed if the temperature is too high. The light is turned on when the door opens and is turned off when the door is closed.
What are some objects?
What are some relationships between objects?
What are some attributes of the objects?
What are some behaviors of the objects?
Two Views of Objects & Classes
Model View verses Language Syntax View
Object - Modeling Perspective
Abstraction in the domain with both
Language View of Smalltalk class
Smalltalk classes are created and viewed with a class browser. As we cover Smalltalk class syntax it will be useful for you to work with a browser. So we will first cover some aspects of the browser, then we will look at the language details. There is a chicken-and-egg problem here. To understand what the browser is showing, you need to know the language details. It helps to use the browser to understand the language details.
Viewing a Class
In most languages, source code is stored in a flat file and viewed with a text editor. Smalltalk provides a set of code browsers to view and edit classes. We will look at some of these browsers using the Point class as an example.
One way to find a Class in VisualWorks
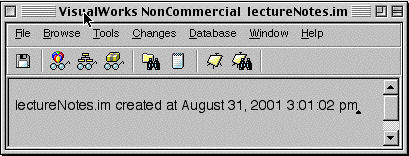
In the Launcher select the "Class named..." item of the browse menu. You will get a dialog window like:

In this dialog type the name of the class you are interested in. You can use wildcard characters if you do not know the correct spelling of the class. The wildcard character * will match any number of characters. The wildcard character # will match any single character. In our example we will use Point. We get a browser that looks like:
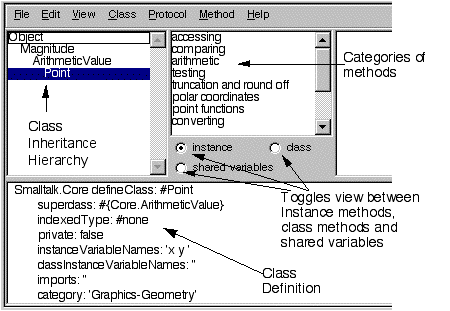
Point Definition Partially Explained
Smalltalk.Core defineClass: #Point superclass: #{Core.ArithmeticValue} indexedType: #none private: false instanceVariableNames: 'x y ' classInstanceVariableNames: '' imports: '' category: 'Graphics-Geometry'
Smalltalk.Core
Using Point
In a workspace type and execute:
| a b | a := Point "x:y: is a class method that creates a point object" x: 1 y: 1. b := Point x: 3 y: -1. Transcript show: a x printString; cr; show: b x printString.This shows that the instance variables x have different values in
Viewing Point Methods
If you click on a category of methods the browser shows all methods in that category. If you click on a method, the bottom pane will display the source code of the method.
Viewing Class Methods
To view the class methods click on the class radio button in the browser.
Some Important Features of the Browser
The browser menu provides some useful functionality. You should try the various menu items to see what they do. We will cover a number of them here.
Class Comments
Select the Comment item in the View menu. The lower pane will show the class comment.
Class Menus
File Out As...
Browse Submenu
Inst Var References...
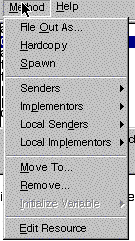
Protocol Menu Items
File Out As...
Hardcopy
Spawn

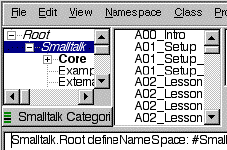
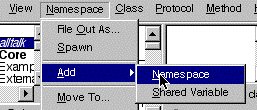
In the left most pane select the Smalltalk namespace. Now select the "Namespace" item in the Add submenu of the Namespace menu.
In the lower pane of the browser you will see the template:
Smalltalk defineNameSpace: #NameOfPool private: false imports: ' OtherNameSpace.* private Smalltalk.* ' category: 'As yet unclassified'
To create a namespace called CS535 edit the template so it looks like:
Smalltalk defineNameSpace: #CS535 private: false imports: ' private Smalltalk.* ' category: 'Course-Examples'
Now accept the changes in the lower pane. This can be done on a PC using right mouse button to get a pop-menu that contains "Accept". Or you can use the browser's "Edit" menu. Once you have accepted the text, you will see the CS535 namespace listed under Smalltalk.
The imports: 'private Smalltalk' allows all classes in the new namespace to use short names to reference all classes in the standard Smalltalk library.
The category: 'Course-Examples' allows us to find the class in the given category when we use the category browser.
Creating a Class in the new Namespace
Select the CS535 namespace in the left most pane. Now select the "Fixed Size" item in the "Add Class" submenu of the "Class" menu of the browser.
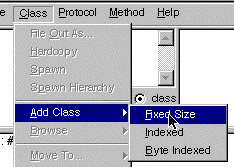
In the lower pane you will the template:
Smalltalk.CS535 defineClass: #NameOfClass superclass: #{NameOfSuperclass} indexedType: #none private: false instanceVariableNames: 'instVarName1 instVarName2' classInstanceVariableNames: '' imports: '' category: 'As yet unclassified'
Edit the template to look like:
Smalltalk.CS535 defineClass: #SimpleCircle superclass: #{Object} indexedType: #none private: false instanceVariableNames: 'origin radius ' classInstanceVariableNames: '' imports: '' category: 'Course-Examples'
Accept the changes. When you do this, you will see the class listed in one of the upper level panes.
Using the Class
The class SimpleCircle does not do much, but we can still create an instance. In a workspace evaluate the following code with "Print it". What happens? Evaluate the code with "Inspect it". What happens?
SimpleCircle new
Adding Methods
Now to add a method to the class. Make sure the class is selected in the browser. Select the "Add..." item in the Protocol menu.
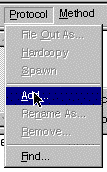
You will be prompted to enter a category name. Enter "accessing". Once this is done the lower pane will contain the template:
message selector and argument names "comment stating purpose of message" | temporary variable names | statements
Edit this code to be:
radius: aNumber radius := aNumber
Accept these changes. After accepting these changes select all the text in the lower pane and replace it with:
area ^radius * radius * Float pi
Accept these changes. Your class now has two methods: area and radius. In a workspace evaluate the following code with "Print it". Is your result reasonable?
| circle | circle := SimpleCircle new. circle radius: 2.0. circle area
You may wish to save your image so you do not lose these changes.
Copyright ©, All rights reserved.
2000 SDSU & Roger Whitney, 5500 Campanile Drive, San Diego, CA 92182-7700 USA.
OpenContent license defines the copyright on this document.
Previous visitors since 13-Sep-01 Next